It’s been a little quiet around here in part because we’ve been prepping for EJ’s trip to Senegal. A whirlwind two weeks abroad for him through USAID & the National Cooperative Business Association’s CLUSA program where he puts his grassroots organizing and outreach experience to work helping the farmers there engaged in conservation farming. He’s halfway through the trip now but with much left to accomplish in the coming days. This is probably my favorite of his week one dispatches from the field.
Day 3: Tuesday, 5 March 2013
Toubakouta, Fatick, Senegal
Simply put, one of the most extraordinary days of my life.
After breakfast, and after having accidentally put instant coffee in my yogurt mistaking it for brown sugar, I checked out and walked the few short blocks to the CLUSA offices. About an hour later, and having a migraine begin to emerge, we were picked up by the Wula Nafaa truck and taken to the their offices. We made a quick stop at the pharmacy were I got some sort of tablet. Not knowing it was for dissolving into water, I popped the giant tablet into my mouth and immediately felt it dissolving on my tongue. For the next few minutes I drank as much water as I could until it was gone. The headache never totally went away, but it was pushed way into the background during the days events.
View original post 1,243 more words
Tonight’s dinner
Breakfast for dinner tonight
sugar and spice pumpkin seeds
I realized as I was looking at our growing list of pumpkin recipes that I gave a shout out to our all-time favorite seed recipe last year without circling back to share the recipe. (As it was one of the very first recipes that entered my binder* from the internet over a decade ago, it seemed only appropriate to place it back on the internet. full circle and all that jazz.)
sugar and spice pumpkin seeds
adapted from Martha’s Sweet & Spicy Pumpkin Seeds
- 1.5 C pumpkin seeds
- 8 tablespoons sugar
- 1/2 teaspoon salt
- 1 teaspoon ground cumin
- 1 teaspoon ground cinnamon
- 1 teaspoon ground ginger
- 2 tablespoons peanut oil
Preheat oven to 250 degrees.
Line a jelly roll baking sheet with parchment paper.
Separate out the seeds from the innards of the roasting pumpkins you just prepped. (I’m partial to the two bowl method of rinsing seeds. Put the seed filled innards in a bowl and fill with water. The seeds will more or less float to the top (you may need to squeeze some free of their pumpkin entrails. If you have a kitchen spider skimmer – the utensil, not the arachnid – use that to skim up the seeds. The pumpkin guts will stick to the mesh, allowing you to easily transfer them to the second bowl. When you’ve got all of the seeds transferred to bowl 2, dump the guts in your mulch bin (or maybe feed it to the worms you are dying to adopt!), and rinse the bowl out. Fill bowl 2 with water and skim the seeds back into bowl 1 to make sure you’ve ditched all the stringy pumpkin.
Spread the seeds out evenly on the baking sheet.
Bake for about an hour, stirring occasionally.
Let the seeds cool while you assemble the spices. Put 5 tablespoons sugar, salt, cumin, cinnamon and ginger into a medium sized bowl.
Heat peanut oil in a large skillet over high heat.
Add pumpkin seeds and the remaining 3 tablespoons of sugar.
Cook until sugar melts and pumpkin seeds begin to caramelize (a minute or so).
Transfer the seeds to the bowl with spices. Stir well to coat all of the seeds with the sugar and spice mixture.
Resist the temptation to pop one in your mouth until they’ve cooled.
ENJOY!
* Bonus points to you if you now snicker (or roll your eyes) at the concept of someone having a binder. No matter your political stripe, I love you a bit more for paying attention to current events.
Recipe for Living
Yesterday started out miserably. Well, except for the part where I get to wake up next to my soul mate. But after she left for work and I began mine, I was constantly reminded of the change in my professional fortune over the past few years.
Things began to look up with a webinar to sharpen my grant writing. Things improved further when I hopped on the bike for the 10 mile ride to the offices of the organization on whose board I sit. These meetings invigorate me. It is such a worthwhile organization that does so much good and is so unsung. A one hour Development Committee meeting and then the two hour Board meeting. I am humbled to be in the same room as my fellow board members. Every one of them committed to the cause and willing to truly work.
Finally, the meetings ended, I ride the 10 miles home in the dark. I love this too; riding at night exercises all of the senses — keeps them all alert. Like grapes on the vine that develop more complexity when stressed a bit, I arrive home feeling revitalized. It helps too that the first thing I see when I walk in is the aforementioned soul mate ensconced on the couch being creative.
The rest of the evening is spent together on that couch enagaged in the busy work we both need to do, whilst occasionally stealing glances and smiles at each other and holding hands when one isn’t needed for our chores.
That was the arc of the day. I am thankful that it ended on a higher plane than where it began.
 The people (of Kingfield Farmers Market) have spoken, and they loved it! (yay!)
The critic (Dan of Butter Bakery) weighed in with a positive review as well. (yay!!)
Those two things combined to make this next recipe a double winner at Kingfield’s season-ending bake-off! (Peter, of Peter’s Pumpkins even proclaimed it better than the beloved prize-winning pumpkin whoopie pies of 2010!) Not too shabby for a recipe I found and tried for the first time the day before the bake-off. If you’ve ever wanted to try your hand at a roll, I highly recommend this one. Beyond the perfection of cream cheese paired with pumpkin spice cake, the cake is actually a snap to roll, and is especially good straight out of the freezer. (hello, homemade dessert for last minute guests!)
pumpkin roll
adapted from this delish.com recipe- 3 eggs
- 2/3 C pumpkin puree*
- 1 tsp lemon juice, fresh squeezed
- 1 C granulated sugar
- 3/4 C flour
- 1 tsp baking powder
- 2 tsp cinnamon
- 1 tsp ginger
- 1/2 tsp nutmeg
Frosting Ingredients:
- 8 oz. cream cheese, softened
- 4 Tbsp butter, softened
- 1 C powdered sugar
- 1 tsp vanilla bean paste
To make the cake:
Preheat the oven to 375°
Sift together flour, baking powder, cinnamon, ginger & nutmeg; set aside.
Beat eggs for at least 5 minutes (they should be light yellow and frothy).
Add pumpkin puree, lemon juice and sugar to the eggs & beat until combined.
Add dry ingredients & beat until combined (scrape down the sides of your bowl well).
Spread the batter evenly in a jelly roll pan lined with silpat or parchment paper.
Bake at 375° for 12-14 minutes. (Cake will spring back to the touch when it’s done.)
When the cake is done, flip it upside down & turn it out onto another piece of parchment paper. Remove the parchment from the exposed ‘bottom’ of the cake. Roll the cake up starting on the short side (I use a clean dish towel to wrap it in after it’s rolled into a log to help it keep that shape as it’s cooling).
While the cake is cooling, make the frosting by whipping together the cream cheese & butter, then adding the vanilla & powdered sugar.
When the cake is cool, carefully unroll it and spread the cream cheese filling evenly.
Roll the frostinged cake back up, and wrap it in plastic wrap.
Freeze overnight (the recipes differ here. many said it was sufficient to refrigerate for an hour. we much preferred it after being frozen).
To serve, unwrap & slice off the ends. Dust with powdered sugar.
Et voila!
* And now, a note about our feature ingredient, PUMPKIN!
All of the recipes I saw called for canned pumpkin. I’m sure canned pumpkin would make a fine version of this roll. I’d be remiss, however, if I didn’t put in a plug for roasting your own pumpkin (especially since one of the things that was praised over the weekend was the unmistakeable pumpkin taste). It’s incredibly easy, if a bit time consuming. It makes the house smell like the essence of autumn warmth, and yields MUCH better pumpkin flavor. (this can perhaps be tied to a trend of canned pumpkin being all kinds of squash other than actual pumpkin.) We covered roasting pumpkin last year, but it bears repeating.
It’s as easy as picking up a pie pumpkin or three (don’t use a carving pumpkin), scooping out the seeds, cutting it up and roasting it (preferably in a dutch oven so it steams instead of caramelizes) for 90 minutes at 350°. Easy peasy. For this go-round, we roasted three smallish pie pumpkins in the 6.75 quart dutch oven. It yielded nearly 4 cups of pumpkin & 2 cups of pumpkin juice. The one thing we did differently this year was to let it strain through cheesecloth for an hour after we pureed it with the stick blender. This drains off a fair amount of liquid, and gives you a pumpkin puree closer in water content/consistency to store bought. As a bonus, you can use the liquid:
pumpkin spice syrup
- 2 C roasted pumpkin juice
- 2 C sugar
- 2 cinnamon sticks
- 1 tsp ground cinnamon
- 1 tsp ground ginger
- 1 tsp ground cloves
- 1 tsp whole cloves
Combine pumpkin juice, sugar and spices in a saucepan. Heat over medium heat until boiling. boil for 1 minute. Take off heat and cool. Use to sweeten your hot caffeinated drink of choice. (I’m sure it would work for coffee, but so far we’ve only used it in tea).
What to do with the leftover pumpkin, you ask? Freeze in ziplocks in increments of your favorite pumpkin recipes for use throughout the winter!
caramel apple sundaes and a trip to sweetland orchard
The granny smith caramel apple sundae in the Food Building at the Minnesota State Fair is the first fair-food I developed a deep and abiding love for. There have been others over the years, but that apple sundae will always hold a special place in my heart for being first. As a kid, I loved the traditional caramel apple. Nuts and caramel stuck to the outside of my favorite fruit on earth? Yes Please! But then… let’s just say there was this ‘playground altercation’ that rendered caramel apples, and the better part of both top front teeth, a thing of the past. (long story short, if you are a pair of 5th grade girls who run fast, it’s perhaps not a good idea to put that talent to use at recess by running through the boys basketball/football/dodgeball games and stealing the ball. Or, if you do, be sure and be the one who sees the angry kid coming before he face-plants you into the blacktop.)
Enter the deconstructed caramel apple sundae. Every bit as good as the original, but with less trauma for the dentalwork. After our workshop with the boys from Brooklyn’s Baked bakery a few falls back, we’ve been obsessed with their Sweet & Salty Brownies. It occurred to me as we were tromping through the gorgeous Sweetland Orchard* two Saturdays ago that their caramel would be perfect for the deconstructed caramel apple sundae. (bonus points for off-setting its naughtiness by drizzling it over apples instead of baking into the sinful sweet & salty brownies, right? right?!). As a bonus, we scored a few of the delightfully crisp Northern Spy Apples to test drive the caramel on.

Clockwise from top: Picking our own at Sweetland Orchard, The amazing Northern Spy apple, Caramel Apple Sundae, making the caramel
WOW! We’ll be doing that again and again. (I prefer a fairly tart apple to offset the sweetness of the caramel, but I’m guessing whatever apple is your fav would work just as well)
Caramel
(adapted from Baked Explorations)
- 1 C sugar
- 1/4 C water
- 2 TBSP light corn syrup
- 1/2 C heavy cream
- 1 tsp fleur de sel (see note)
- 1/4 C sour cream
In a medium pan, combine the sugar, water and corn syrup. Stir together carefully (don’t splash the sides of the pan). Cook over high heat, until it turns a dark amber in color (watch it carefully. When it starts to change color, it goes from blonde, to light amber to dark amber to burnt quickly). Remove from the heat and slowly whisk in the cream (it will bubble up). Then add the fleur de sel. Whisk in the sour cream. Set aside to cool.
Note on the fleur de sel: We didn’t have any this time, so I used Hawaiian alaea salt instead. It worked just as well.
Note on caramel making: We’ve both made this solo, which works just fine. It was, however, much easier to simultaneously stir the corn syrup mixture and pour the cream with an extra set of hands.
* A Word about Sweetland Orchard
Sadly, apple season at Sweetland is nearly over. Mother Nature was a particularly harsh mistress last spring. Apple blossoms don’t take kindly to being coaxed into blooming in way early spring only to be hit by a punishing frost. Apples blossoms and frost so do not play well together. As a result, Mike and Gretchen have become poster kids of sorts for what happens when weather takes out 90% of your crop before the season even really begins. (a quick visit to their website’s As Seen Around Town page is filled with great and media about the amazing cider donuts & etc about the apples, but also highlights appearances due to the 2012 Spring Freeze) I’m not sure I’d be able to present such a zen face to the world if I was in their shoes. If you are within driving distance and looking for something fun to do this Saturday night, consider showing your support at the Big Orchard Shindig. A bunch of amazing Twin Cities food folks have banded together to put on what looks to be an fun-tastic fall evening as a benefit for the Orchard.
non-recipe for kohlrabi matchsticks
 When you’re in the middle of summer, and in the middle of an unprecedented heat wave (and without working central air), the last thing you want to do is turn on any of the heat generating appliances in the kitchen (which is a currently a cool 91°). So food options that don’t call for cooking one of the ingredients are our favorite thing at the moment. And while I’ll always have a fondness for raw carrots, my current raw obsession is kohlrabi. Sure, it can be steamed, scalloped, sautéed, boiled, braised, roasted or puréed. But for my money, peeled and sliced up like matchsticks is the way to go. (you can also shred it and toss it into your favorite chicken curry salad) As a bonus, it’s good for you (certainly better than that bag of chips that makes googly eyes at you every time you walk down that grocery aisle for sparkling water). Next year, this is totally going into our home vegetable beds.
Today’s recipe is (as many of mom’s recipes are), more of a guideline or plan of action than formal recipe with weights and measures. At the heart of it, it’s dead easy. Gently caramelize some sliced onions (use butter, not oil!); form* then fry up some ground beef patties (use good quality ground beef, and simply salt and pepper each side); take the patties out of the pan & make a brown gravy in it; put the patties back in the pan, spoon a bit of gravy over each patty, then gently place mounds of caramelized onions on each & serve – preferably with some boiled potatoes. (It’s also forgiving. If the dish has to sit covered on a warm burner for a bit while dad finishes up in the garage and then scrubs his hands clean, it’s none the worse for wear).
But that little phrase “make brown gravy in the pan?” That part vexed me for decades. This, incidentally, is why some people find it difficult to learn from my mom in the kitchen (hi sis!). When pressed, she will certainly be patient and slow her pace so that you can measure everything she’s doing. Thing is, the next time, the measurements may well be different. It all depends on the feel of the ingredients (or the size of the eggs), the number of people you’re feeding (and sometimes what’s currently on hand in the pantry). At the base of what seems (to a faithful recipe-following-measur-er) to be a chaos, however, there is structure. When you know the ratio of flour to butter for a roux, for example, and can measure by sight, the seemingly random tosses of flour and pats of butter have predictable order. When you’re making that roux in the pan you’ve just sauteed ground beef patties in, the drippings factor in as well (as does the fat content of your ground beef). And if you’ve saved the potato water (of course you did! you wouldn’t just send it down the drain would you?!) to use in the gravy, you’ll need to remember not to add too much flour because the starch in the water will also act to thicken your gravy. Whisk the bejesus out of it as you’re going along (otherwise lumps!), and at the appropriate moment, add a touch of the Danish equivalent of “kitchen bouquet” for color, and bob’s your uncle, you’ve got gravy. It’s not exactly alchemy, but it might as well be for me. Luckily, I’m only ½ of the kitchen duo in residence here. Mom’s technique has now been safely passed along to EJ (who will make me all of the bøf med løg I’ll ever need, right?!)
What follows is a short photo essay of the master at work (on her birthday no less!). Even though it’s typically the birthday person who decides dinner, this one came at dad’s request. Ever magnanimous (and as a nod to the fact that it was also their anniversary), mom let dad pick the meal that night. And while it was never a favorite of mine growing up, it has come to be the quintessential comfort / transport-me-back-home meal. I’m really grateful she not only tolerates the camera in the kitchen, she seems to enjoy passing the family recipes to us with a side of photography.
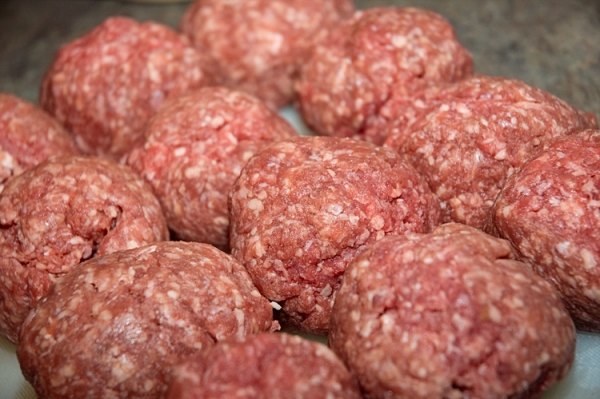
[I’ve never seen mom’s patty making process in the US. American technique seems to universally favor pressing hamburger patties into shape. For these, as well as patties destined for the grill, mom has never formed them with her hands. In researching other versions of this recipe, I’m seeing that it’s the Danish standard to do it mom’s way. Begin by forming the ground beef into balls. They are then rhythmically chopped into submission with a chef’s knife. Basically, you deploy small quick chopping motions first on one angle, then slide the knife underneath to release it from the cutting board, turn a few times to shore up the sides (using the flat of the knife to guide the edge) and repeat at a 90 degree angle to the first direction. Then do the whole thing over again on the other side. With a little practice, you end up with absolutely identical pucks of beef ready to be browned.]


